
Provider accounts
what to set up outside OUTRIDER.
Some features need an account or an approval at another company. None is needed for paper mode. This page lists each one, what to do there, what to bring back to OUTRIDER, and how to test the desk while you wait.
01At a glance
The commands on this page are written for the shell of macOS and Linux (bash or zsh). On Windows, run them in WSL (Windows Subsystem for Linux, Ubuntu) or Git Bash: commands such as cp, openssl, rm -rf and multi-line curl with \ do not work as written in PowerShell or cmd. The node and npm commands work in any of them.
| Provider | For | You bring back | Where it goes |
|---|---|---|---|
| Solana RPC provider (Helius, QuickNode, Chainstack…) | A stable pump.fun stream; required for live pump.fun | An https:// endpoint URL (usually with a key in it) | Console → Integrations → Solana RPC URL |
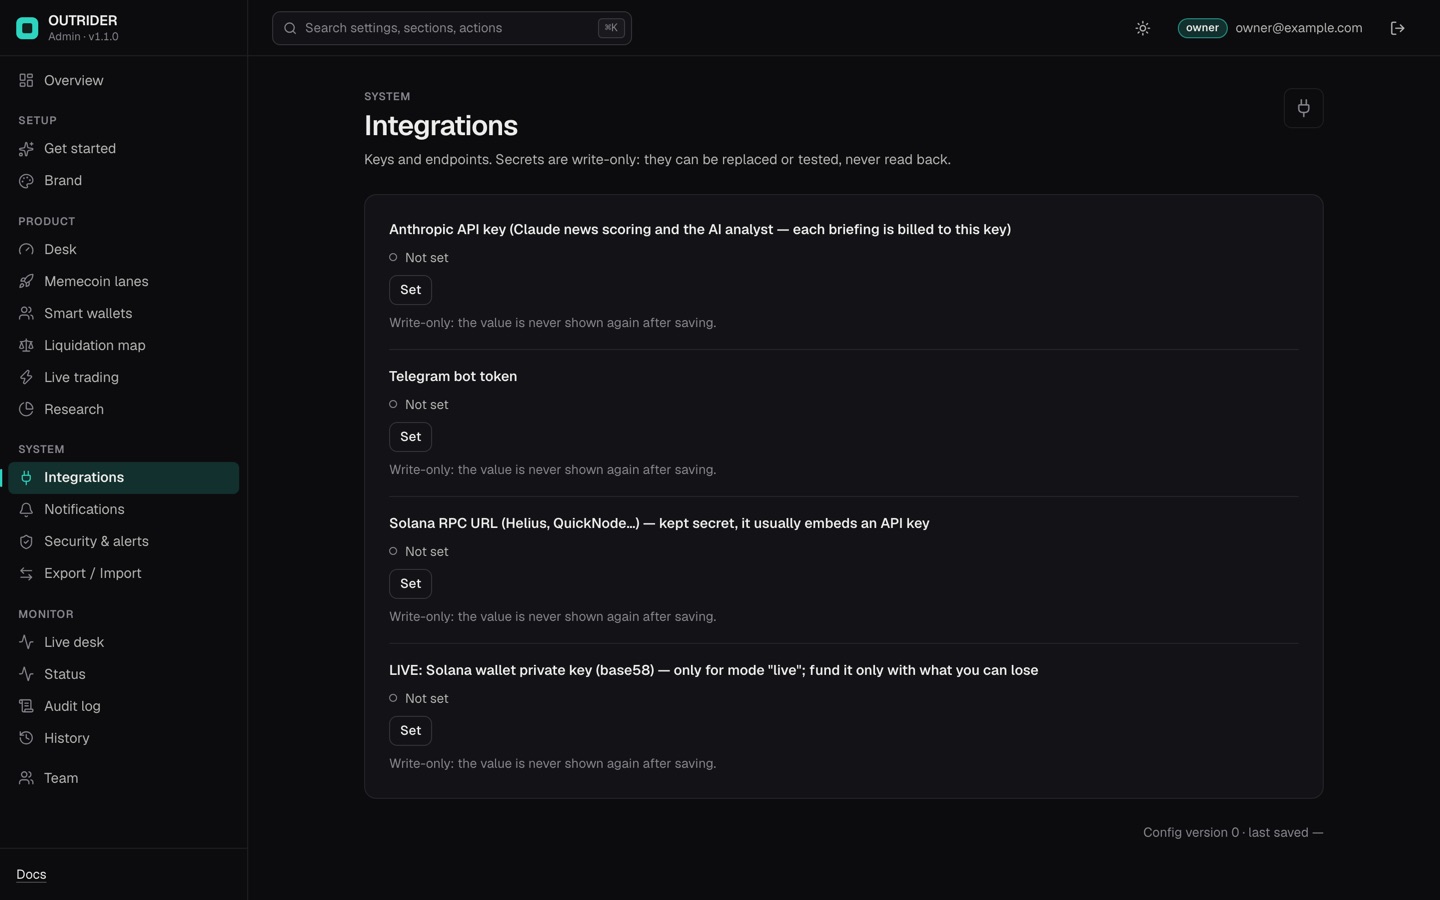
| Anthropic | AI analyst and Claude news scoring | An API key | Console → Integrations, or ANTHROPIC_API_KEY |
| Telegram @BotFather | Alerts and commands | A bot token, and your chat id | Token: console or TELEGRAM_BOT_TOKEN. Chat id: TELEGRAM_CHAT_ID only |
| Hyperliquid | Live trading of the trend and HL copy books (perps module) | An API wallet private key and your account address | Console → Integrations (LIVE fields), or HL_API_WALLET_KEY and HL_ACCOUNT_ADDRESS |
| TypeSafe | The Jev forecaster (jev module) | An API key, after your access request is granted | Console → Integrations, or TYPESAFE_API_KEY |
| PumpPortal | Building live pump.fun transactions | Nothing: the code calls its public local-trade API without a key. In live mode PumpPortal charges its own fee per trade, paid from your wallet (see costs) | — |
Click paths below are the providers' own menu labels as of October 2026. Provider websites rename menus often; if a label differs, the provider guide linked in each step is the reference. Costs: Services and costs.
02Solana RPC provider
Who pays: You open the account with the RPC provider and you pay for your own usage: free tiers exist, and anything above them is a paid plan billed by that provider to you, not part of the item price.
- Create an endpointSign up at a Solana RPC provider such as Helius, QuickNode or Chainstack and create a Solana mainnet endpoint. A free tier is enough to start.
- Copy the HTTPS URLIt usually contains your API key. Treat it like a password.
- Put it in the consoleIntegrations → Solana RPC URL (owner). The desk derives the WebSocket by replacing
httpwithws. If your provider gives a different WebSocket address, setsolanaRpcandpump.wsUrlinconfig.jsoninstead (how). - Test it
curl -s -X POST -H 'content-type: application/json' \
  -d '{"jsonrpc":"2.0","id":1,"method":"getHealth"}' '<your https RPC URL>'
# a healthy endpoint answers {"jsonrpc":"2.0","result":"ok","id":1}
node src/cli.mjs doctor   # checks "Solana RPC" and "pump.fun stream (WS)"
Where to click (labels as of October 2026):
- Helius: dashboard → RPCs in the left sidebar → copy the Mainnet HTTPS URL (it ends in
?api-key=…). The key itself is under API Keys. Helius guide: Helius docs → Authentication; to limit who can use the key: Helius docs → Protect your keys. - QuickNode: dashboard → Endpoints → Create an endpoint → choose Solana and Mainnet → the endpoint page shows the HTTP Provider URL. QuickNode guides: How to use the QuickNode dashboard and QuickNode Solana docs.
- Chainstack: console → Projects → your project → add a Solana mainnet node → the node page → Access and credentials → copy the HTTPS endpoint. Chainstack guide: Chainstack docs → Manage your node.
Meanwhile: the public endpoint works for paper testing; expect the stream to drop sometimes.
03Anthropic API key
Who pays: You open the Anthropic account and you pay for your own usage: every analyst briefing and every news-scoring call is billed by Anthropic to your account, not part of the item price.
- Create a keySign in at console.anthropic.com, set up billing for API use, and create an API key. Usage is billed per request to your account.
- Put it in the deskConsole → Integrations → Anthropic API key (owner), or
ANTHROPIC_API_KEYin.env. - Test it
After a few hours of running, the dashboard shows the first AI analyst briefing, and Telegramcurl -s https://api.anthropic.com/v1/models \ -H "x-api-key: $ANTHROPIC_API_KEY" -H "anthropic-version: 2023-06-01" | head -c 300 # a list of models means the key works; an "authentication_error" means it does not/briefreturns it.
Where to click (labels as of October 2026): console.anthropic.com → Settings → API keys → Create key → give it a name such as "outrider" → copy the key (it starts with sk-ant- and is shown only once). Billing is under Settings → Billing. Anthropic's guide: Anthropic docs → API → Getting started.
Meanwhile: without a key, news uses keyword scoring and there is no briefing. Everything else works.
04Telegram bot (@BotFather)
Who pays: Telegram bots are free at the time of release; the bot is created in your own Telegram account and runs under Telegram's terms.
- Create the botIn Telegram, open @BotFather, send
/newbot, choose a name and a username. BotFather replies with the bot token. - Start a chat with itOpen your new bot and press Start.
- Find your chat idSend the bot any message, then open
https://api.telegram.org/bot<token>/getUpdatesin a browser while the desk is stopped, and read"chat":{"id":…}(details). - Bring both backToken in the console (Integrations) or
TELEGRAM_BOT_TOKEN; chat id inTELEGRAM_CHAT_ID. Restart the desk.
What you see: after /newbot, a name and a username ending in bot, BotFather answers with a message that contains a line like 123456789:AA…: that whole line is the token. Telegram's guide: Telegram → From BotFather to "Hello World" → Obtain your bot token; the getUpdates answer format: Telegram Bot API → getUpdates.
Meanwhile: alerts are printed in the terminal and shown in the dashboard.
05Hyperliquid API wallet
Who pays: The account and the funds are yours: Hyperliquid's trading fees and funding are paid from your own account, and any loss is yours. None of it is part of the item price.
Only for live trading of the trend and HL copy books, which belong to the perps module (off by default). Reading Hyperliquid data, for example for the liquidation map, needs no account.
- Generate an API walletOn Hyperliquid, open the API page of your account (the code comment calls it "Hyperliquid → API"), generate an API wallet (also called an agent) and authorise it for your account. An API wallet can place orders for your account but cannot withdraw.
- Copy two valuesThe API wallet's private key (0x followed by 64 hex characters), shown when you generate it, and your account address (0x followed by 40 hex characters): the main account the API wallet trades for, not the API wallet's own address.
- Bring them backConsole → Integrations → LIVE: Hyperliquid API wallet key and LIVE: Hyperliquid account address (owner), or
HL_API_WALLET_KEYandHL_ACCOUNT_ADDRESS. - Check the formatLive mode refuses to start with a clear line if either value has the wrong shape (messages).
Where to click (labels as of October 2026): connect your wallet at app.hyperliquid.xyz/API → enter a name for the API wallet → Generate → copy the private key shown → Authorize API Wallet and confirm in your wallet. Hyperliquid's own description of API (agent) wallets: Hyperliquid docs → Nonces and API wallets. Testnet funds: Hyperliquid docs → Testnet faucet.
Meanwhile, test without risk:
- Dry run (on by default): every order is built and checked but not sent. The Live tab of the ledger lists each one.
- Hyperliquid testnet: switch on Live trading → Hyperliquid testnet (
live.hyperliquid.testnet). Orders and the account snapshot then go to Hyperliquid's testnet, which has its own accounts and test funds, so you need an API wallet authorised there. How to get testnet funds is described by Hyperliquid (testnet faucet). Prices and signals still come from mainnet data.
06TypeSafe access (Jev)
Who pays: Access is granted by TypeSafe under its own terms; if TypeSafe charges for the API, you pay it directly. It is not part of the item price.
Jev is TypeSafe's forecasting model and belongs to the jev module, off by default: set "modules": { "jev": true } in config.json to use it. Its API is in early access: you request access from TypeSafe and receive a key if they grant it. OUTRIDER does not control that process or its timing; follow the instructions on typesafe.ai.
What to tell them, in general terms: who you are, that you want to use the Jev API from a self-hosted research desk, what for (hourly yes/no questions on whether BTC, ETH and SOL will be higher in 60 minutes, scored against simple control forecasts), and the volume. The desk limits itself to jev.maxPerSecond (default 8) requests per second and jev.maxCallsDay (default 20,000) per day. Never send them your other keys.
When the key arrives: put it in Console → Integrations → TypeSafe Jev API key, or TYPESAFE_API_KEY, then run node src/cli.mjs doctor: the TypeSafe Jev line turns ✅ and lists the models. The desk keeps Jev in shadow mode (it only logs its answers) until Jev passes the desk's own promotion rule (Jev, measured).
Meanwhile: the desk runs fully without it. doctor shows · TypeSafe Jev … TYPESAFE_API_KEY not set → Jev is optional — the desk runs without it, and that line does not count as a failure.
07Testing while you wait
- Paper modeThe default. Live data, simulated fills, no keys. Run it for days and judge the results (report).
- Dry runIn live mode, with Dry run on, real keys are checked and orders are signed and simulated, never sent.
- Hyperliquid testnetFor the Hyperliquid books of the perps module, real orders against test funds.