
● Start · No experience needed
Getting started
from the zip to your first paper day.
A plain-language walkthrough for your first hour. You will install one program, type a few commands, create your console account and watch the desk trade on paper. No keys and no money are needed for any of it.
01Before you start
- A computer with macOS, Linux or Windows, and an internet connection.
- About 2 GB of free disk space for the program and its first recordings.
- A terminal: the app where you type commands. On macOS it is called Terminal (in Applications → Utilities). On Linux, your usual terminal. On Windows, install WSL (Windows Subsystem for Linux, with Ubuntu) or Git Bash and type the commands there: they are written for macOS and Linux shells, and a few of them (
cp,openssl, multi-linecurl) do not work as written in PowerShell.
Whenever you see a dark box below, press Copy, paste it into the terminal and press Enter. Grey text after # is only an explanation.
02Ten steps
- Unzip the downloadUnzip the file from CodeCanyon into a folder without spaces in its name, for example
outriderin your home folder. - Install Node.js 22Download the LTS installer for your system from nodejs.org and run it (version 22 or newer). Then close and reopen the terminal and check:
node --version # must print v22 or higher - Open the folder in the terminalType
cdand a space, drag the unzipped folder onto the terminal window, and press Enter. Everything from now on runs in this folder. - Install and buildThe first command downloads the exact package versions listed in
package-lock.jsonand takes a minute or two. The second compiles the operator console once (you repeat it only after an update).npm ci npm run buildnpm cishould end withfound 0 vulnerabilitiesor a similar summary, not withERR!.npm run buildprints its command (tsc -p tsconfig.json) and no error lines when it succeeds. If either fails, see Troubleshooting. - Open the console without tradingThis starts only the dashboard and the operator console; nothing trades yet.
On your own computer you do not need anpm run dash.envyet: withoutADMIN_SETUP_TOKEN, the terminal prints a block like this, and the 16-character code is your one-time setup code:
On a server, set[admin] No owner account yet. Open /admin and create it with this one-time setup code: <setup code> [admin] The code is shown once, here only. Each start before the owner exists adds a new code; any printed code works until the owner is created. [admin] To choose the secret yourself instead, set ADMIN_SETUP_TOKEN in the environment and restart. Admin console http://127.0.0.1:8790/admin — create the owner with ADMIN_SETUP_TOKEN (or the setup code printed above)ADMIN_SETUP_TOKENin.envinstead and use that value (how). - Create your owner accountOpen
http://127.0.0.1:8790/adminin your browser. Paste the setup code (or yourADMIN_SETUP_TOKEN), enter your email and a password of at least 12 characters. The console then walks you through a few setup fields (mode, product name, accent colour); leave Mode on Paper trading. Details: Create the owner. - Start your first paper dayGo back to the terminal, press Ctrl+C once to stop, then start the full desk:
Every 20 seconds it prints one line with equity, open positions, news, candidates and pump.fun events. Leave the terminal open: closing it stops the desk.npm start - Read the dashboardOpen
http://127.0.0.1:8790and sign in. Start with three things: the mode chip in the header (it should say PAPER), Desk control (what is blocking new entries, if anything) and the pump.fun panel (coins being watched and why each was accepted or refused). Most candidates are refused; that is normal (why). Every figure is paper money, not earnings. Full tour: The dashboard. - Optional: Telegram alertsCreate a bot with @BotFather, put the token in the console (Integrations) and your chat id in
.env, then restart (Telegram bot). - Optional, much later: live mode with a dry runOnly after you have watched paper results for a while and read What it is not. Live mode starts with Dry run on: orders are signed and simulated, never sent (Live trading). Live trading uses your own money and can lose it.
03Is everything working?
Run the built-in check in a second terminal window, in the same folder:
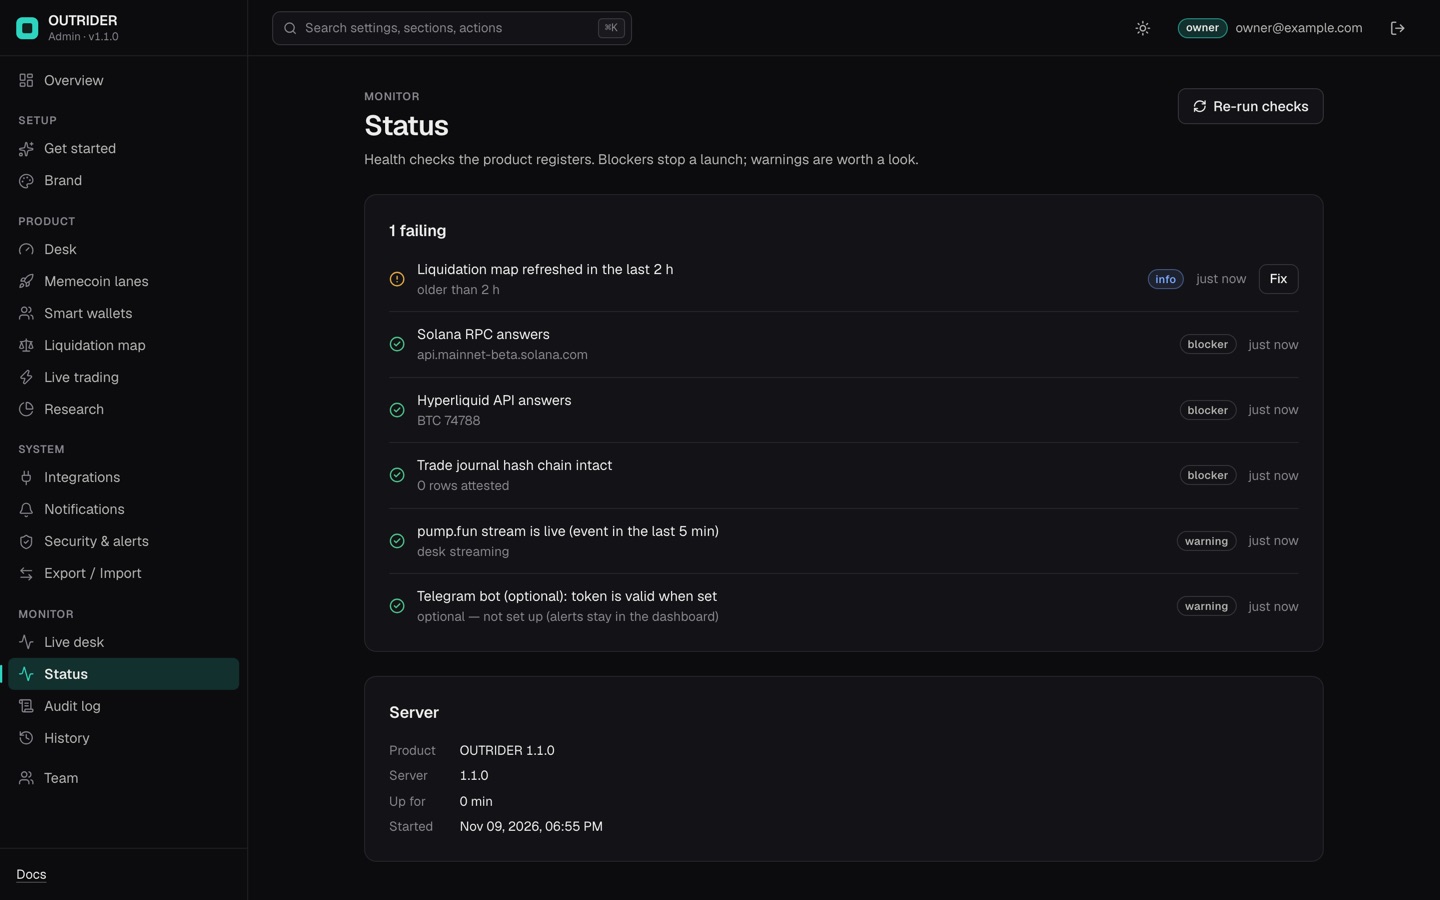
node src/cli.mjs doctorEach line starts with ✅ (works), ❌ (failed, followed by what it breaks) or · (optional, not set up). Services of the optional modules (for example Polymarket) are shown with · while their module is off, and do not count as failures. The console's Status page (Monitor → Status) runs the main checks too.
04Day to day
- Stop: press Ctrl+C once and wait; the desk saves its state first.
- Start again:
npm start. It continues where it stopped. - Pause buying without stopping: the kill switch on the dashboard, or
/stopin Telegram. - Keep it running for days: a laptop that sleeps leaves gaps. Use a small server (Deployment).
- Back up the
data/folder and keep the secret key separately (what to back up).